
The all new Pandora Pi is the most flexible system we have ever offered. We have taken the complexity out of Raspberry Pi installations and come up with a smooth running retro game emulation beast!
The VERY FIRST setting that is most important is to push the SETTING and START buttons at the same time to exit from a game back to the main menu!
The instructions for most basics are on screen such as below the main menu screen settings. Many of the settings will guide you through the process such as mapping a new joystick. See below for more information on settings.
Main Menu Screen

1- Joystick selects Game consoles Up / Down Press “B” or corresponding mapped button to select Console and enter games list for that console.
2- “R” mapped button brings up the search menu.
3- Start Button opens the main settings menu where most basic system settings are located
4- Select (Hot button) will open the Power down selection screen. This is the proper way to turn off especially to retain any system settings made during the session. They can be lost if not properly saved and powered down.
Game selection screen
From here the basic onscreen settings bar changes to the below:

1- Up / Down selects games
2- Left / Right will scroll to another Console and game list
3 – “A” Mapped button goes back to main menu screen
4- “B” mapped button selects game
5- “Y” mapped button marks / un-marks the selected game as a favourite and adds it to the favourites game list
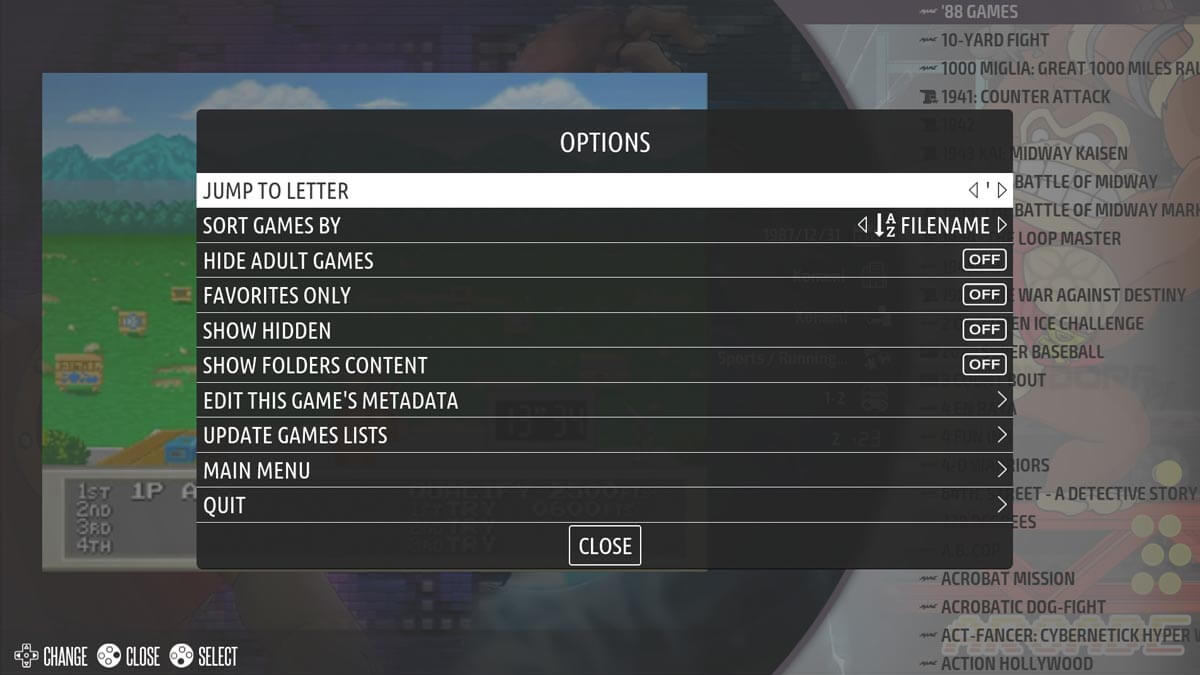
6- Start Button opens a different setting menu here with options to edit the game rom settings directly for that individual game and other settings for the selected console game list (see image below)
7- Select button will filter the games to ONLY ones marked as Favourite of that particular console. You may access the main menu screen favourites category to see favourite games from all consoles in one list.
Game selection screen setting menu:
How to ADD GAMES
Now here is where things get interesting with Pandora Pi. We have chosen the Recalbox platform to build off as it is the smoothest and “less technical” of all the Raspberry Pi operations systems. With our system you may add Game ROMs DIRECTLY to the SD card! Most other platforms will not allow you to direct read / write the SD card as it is in Linux format. You may then only SSH into the Pi over wifi. This is still a great option for settings updates and all other functions, however can be slower when uploading large or many files.
To manually add via SD card
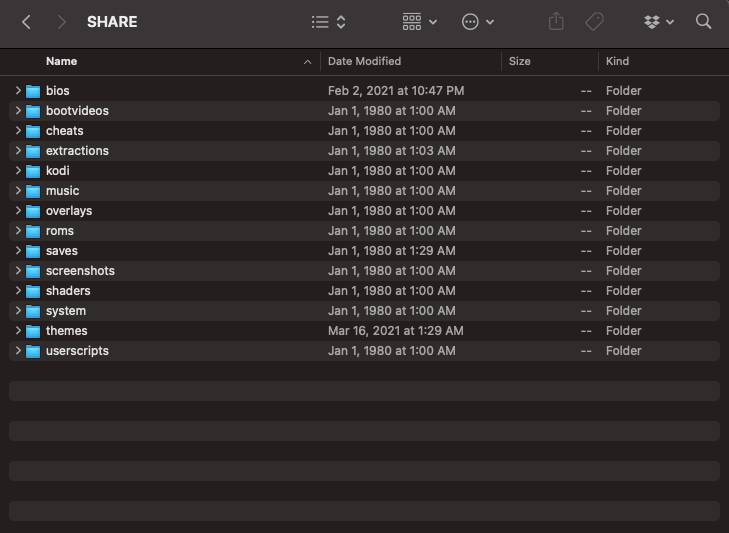
Insert the SD card into your laptop PC or Mac, you will two droves open one called RECALBOX… leave that one alone 😉
You want the Drive called SHARE
See shared folders
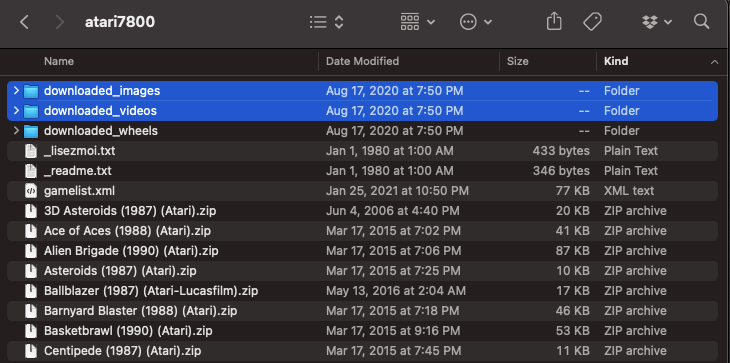
Open the ‘roms’ folder to see all systems / console folders. Each system has a README file that will explain the file formats and compatible ROMs like below:
Put your atari 7800 roms in this directory.
Rom files must have a “.a78/.bin/.zip/.7z” extension.
This system allows to use compressed roms on .zip/.7z.
But, it is only an archive. Files inside the .zip/.7z must match with extensions mentioned above.
Each .zip/.7z file must contain only one compressed rom.
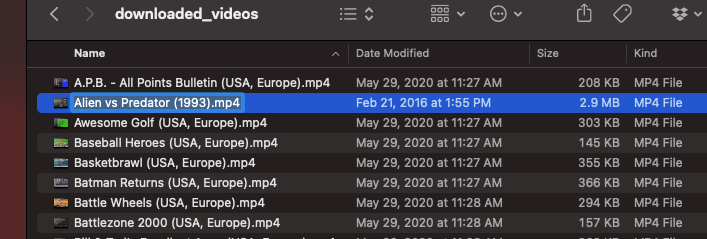
Once you have copied in the Game ROM to the correct folder you now will want to add the Game box art and Snap video into the folders of that console. See below
Now that you have added the ROM the Box art (or graphic) and the demo snap video, you will need to add the game to the system game list to properly show the game and the video in the mani menu.
Open the file called gamelist.xml with any text editor
Here you will see all the games listed with some code that assigns the Game to the list and tell it where to find the artwork and video. It may look overwhelming but we assure you its very easy to do. See the code below of what a game rom listing would be:
<game>
<path>Batman Returns (USA, Europe)Batman Returns (USA, Europe).lnx</path>
<name>Batman Returns</name>
<video>downloaded_videos/Batman Returns (USA, Europe).mp4</video>
<image>downloaded_images/Batman Returns (USA, Europe).png</image>
</game>
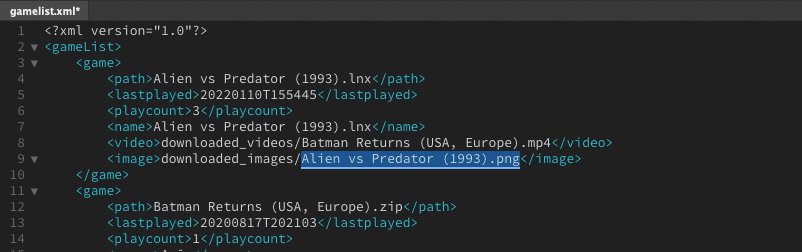
You would edit the blue parts of the code leaving the Bold black text as thats the “code” the systems needs.
The <path> is the location the Game ROM file. The .lnx at the end of the rom name will be different based on the system, you will see this in the rom name itself.
<name> is what you want to show on the front end for the Game list
<video> is the name of the video snap file with the extension of the video folder name such as downloaded_videos/ being the video folder name for this rom set. Note it can vary but you see it in the folder adjust as needed.
<image>downloaded_images/ same idea as the videos above but for the still image artwork
Save once you have added this to the gamelist.xml and the game will now show on the front end… thats it!!
Adding Game ROMs over SSH wifi
You may also add a game without removing the SD card from the system. You will need to wirelessly connect to the pi from a pc or mac via wifi connection.
When wifi activates there may be a pop up (it disappears after a bit) asking to update Recalbox… we do NOT recommend the update. They system has custom configurations that may be lost if updated. Please do so at your own risk. Note: You would also have to remove some game roms to make room for the update to download.
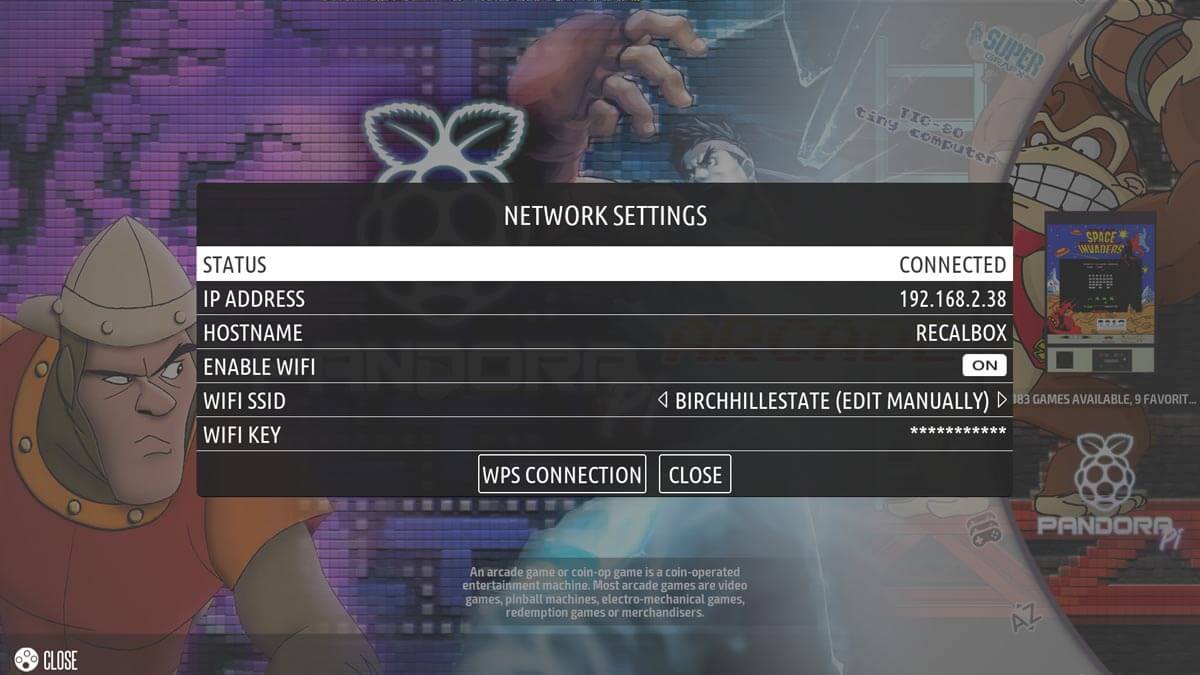
First you will need to go to the main setting menu (press Start from main screen) and scroll to NETWORK so you can connect to your wifi and retrieve the ip address of the system on your network.
1- Turn on ENABLE WIFI
2- Select your wifi network
3- Enter your wifi network password
4- Wait a moment while the IP ADDRESS populates (sometimes exiting screen and returning speeds it up)
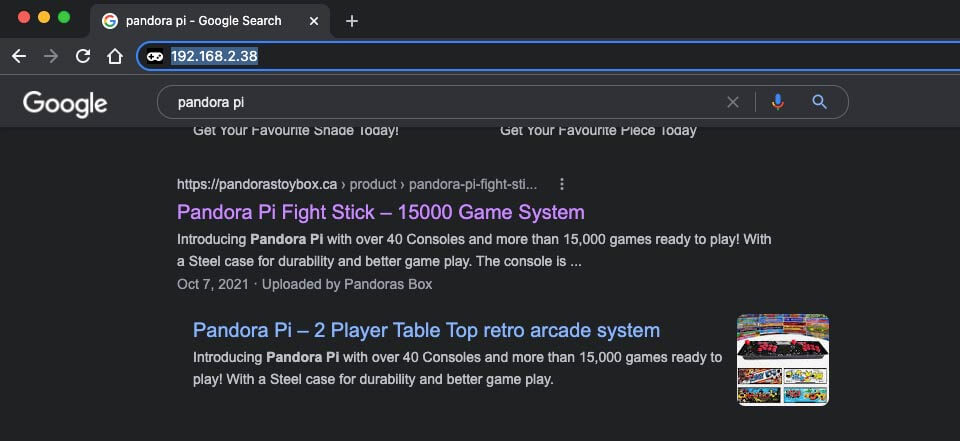
Write down this number. In the case below it is 192.168.2.38 – yours will be different!
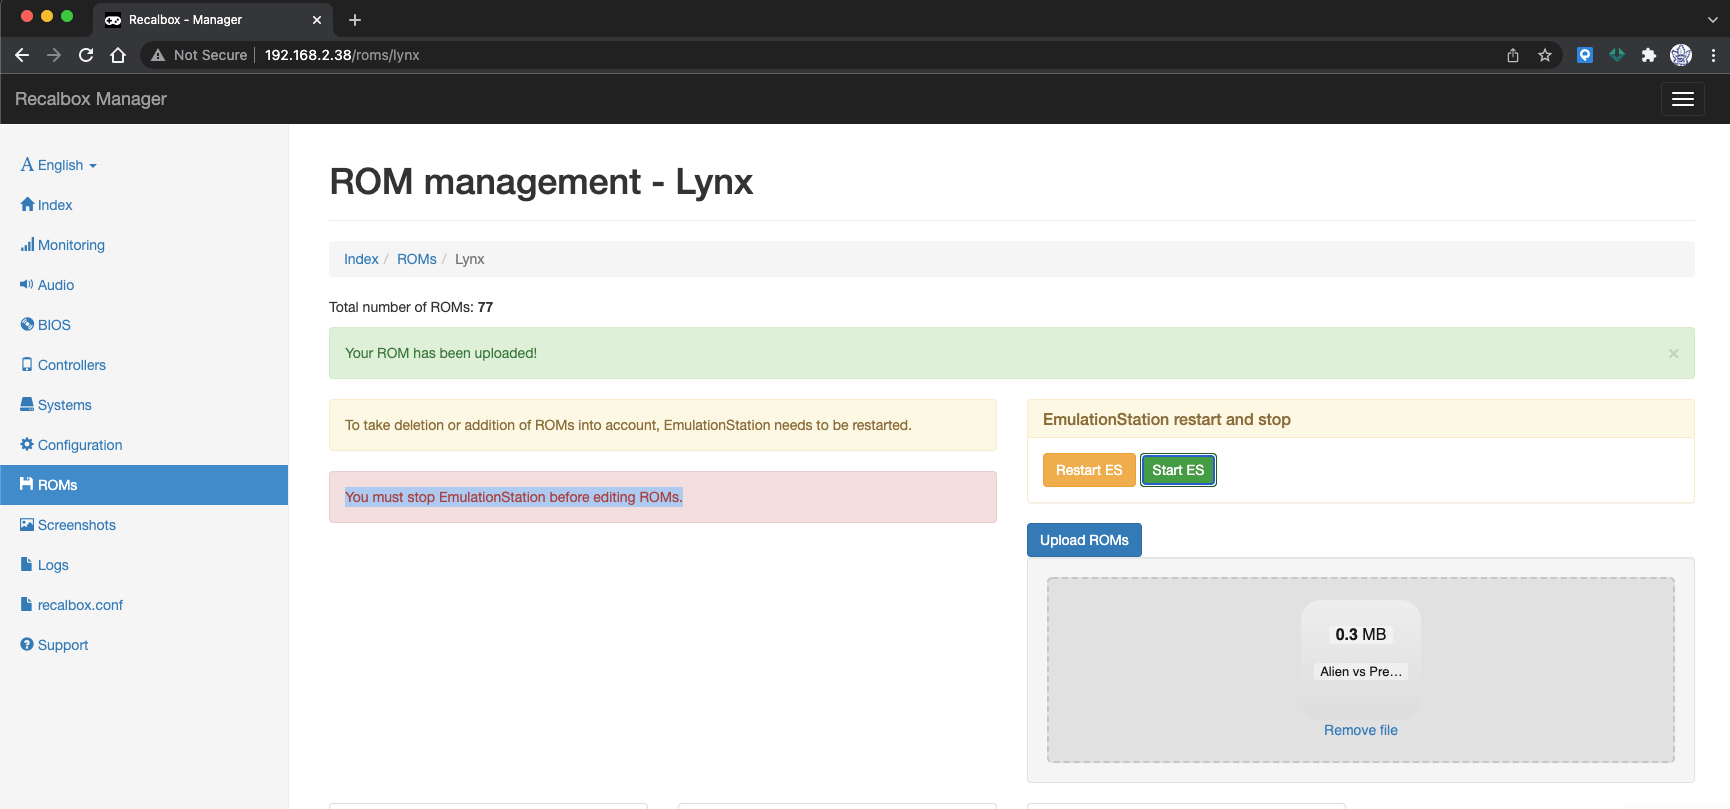
Now open Chrome ( or any web browser) and enter this number in the web url line. It will open a “webpage” with the Recalbox settings.
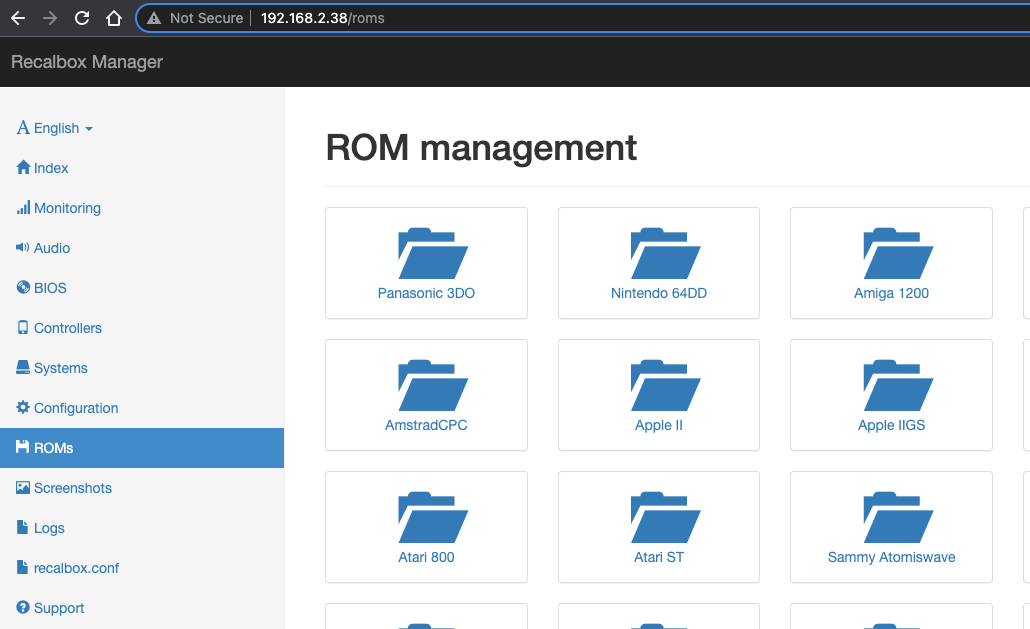
There are many settings available here you can research on Recalbox Wiki support here: https://wiki.recalbox.com/en/home
For game ROM addition select the system folder you would like to add to and follow the onscreen instructions. For example Stopping the Emulation Station so it will recognize the new roms on reboot.
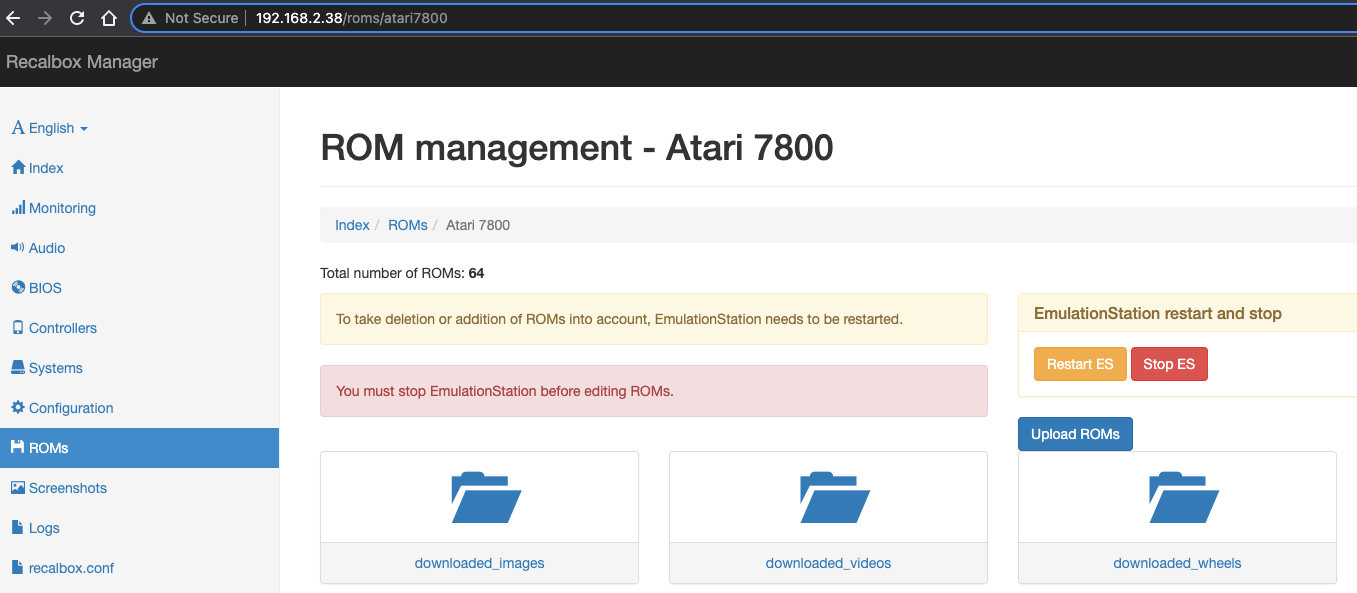
Click UPLOAD ROMS buttons and drag the file into the drop area. Then restart Emulation Station (ES) and it will boot up and add the game to the games list automatically. Thats it!! now your new game is available in the game list and ready to play.